While it’s not recommended for production servers, because you have
to manually ensure your install of phpMyAdmin is kept up-to-date, you
can also install phpMyAdmin from source.
Step 1: Identify Apache’s DocumentRoot
We need to find Apache’s DocumentRoot so we know where to place our phpMyAdmin files:
|
|
$ grep DocumentRoot /etc/apache2/sites-available/000-default.conf
DocumentRoot /var/www/html
|
In this case, we’ll need to put the phpMyAdmin files in
/var/www/html.
Step 2: Download Latest Version of phpMyAdmin
The stable version of phpMyAdmin at the time this article was written: phpMyAdmin 4.3.11.1 (released 3/4/2015).
Visit the
phpMyAdmin download page to grab the latest version of phpMyAdmin.
I ended up with a
phpMyAdmin-4.3.11.1-english.tar.gz file in my
/var/www/html directory.
|
|
$ cd /var/www/html
$ ls
index.html phpMyAdmin-4.3.11.1-english.tar.gz
|
Step 3: Unpack phpMyAdmin Files
|
|
sudo tar xvzf phpMyAdmin-4.3.11.1-english.tar.gz
|
Now rename the
phpMyAdmin-4.3.11.1-english directory:
|
|
sudo mv phpMyAdmin-4.3.11.1-english phpmyadmin
|
Remove the phpMyAdmin files:
|
|
sudo rm phpMyAdmin-4.3.11.1-english.tar.gz
|
Step 4: Secure /phpmyadmin Directory
We want to set up a specific user for our phpMyAdmin install.
|
|
$ sudo adduser phpmyadmin
Adding user `phpmyadmin' ...
Adding new group `phpmyadmin' (1001) ...
Adding new user `phpmyadmin' (1001) with group `phpmyadmin' ...
Creating home directory `/home/phpmyadmin' ...
Copying files from `/etc/skel' ...
Enter new UNIX password:
Retype new UNIX password:
passwd: password updated successfully
|
|
|
sudo chown -R phpmyadmin.phpmyadmin /var/www/html/phpmyadmin
|
Step 5: Update phpMyAdmin config.inc With Install Wizard
To use the phpMyAdmin install wizard, we first need to set up the
config.inc file.
|
|
cd /var/www/html/phpmyadmin
sudo mkdir config
sudo chmod o+rw config
sudo cp config.sample.inc.php config/config.inc.php
sudo chmod o+w config/config.inc.php
|
Step 6: Run phpMyAdmin Install Wizard
To begin the installation of phpMyAdmin, access the installation URL at:
http://example.com/phpmyadmin/setup/index.php
Under the “Servers” section, click on “New Server.”
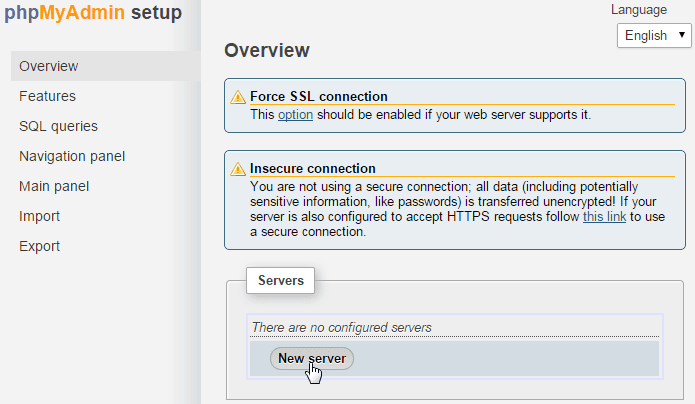
Under the “Servers” section, click on “New Server.”
Under the “Authentication” tab, type in your MySQL root password in the “Password for Config Auth” box and then click “Apply.”
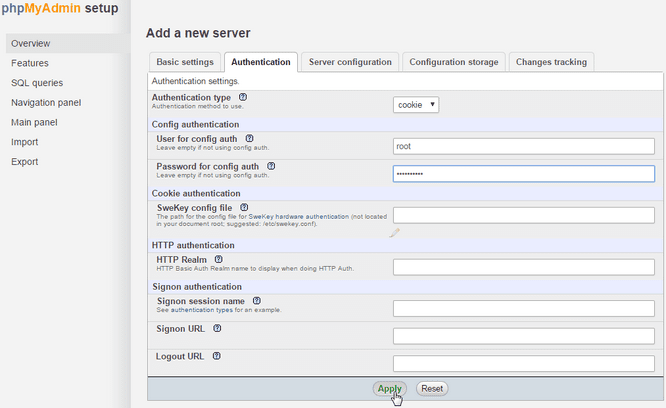
In the “Password for Config Auth” box, type in your MySQL root password.
Remove the phpMyAdmin
/config directory for security.
|
|
sudo rm -rf /var/www/html/phpmyadmin/config
|
Tidak ada komentar:
Posting Komentar