Install phpMyAdmin from Source
Step 1: Identify Apache’s DocumentRoot
We need to find Apache’s DocumentRoot so we know where to place our phpMyAdmin files:Step 2: Download Latest Version of phpMyAdmin
The stable version of phpMyAdmin at the time this article was written: phpMyAdmin 4.3.11.1 (released 3/4/2015).Visit the phpMyAdmin download page to grab the latest version of phpMyAdmin.
I ended up with a phpMyAdmin-4.3.11.1-english.tar.gz file in my /var/www/html directory.
Step 3: Unpack phpMyAdmin Files
Step 4: Secure /phpmyadmin Directory
We want to set up a specific user for our phpMyAdmin install.Step 5: Update phpMyAdmin config.inc With Install Wizard
To use the phpMyAdmin install wizard, we first need to set up the config.inc file.Step 6: Run phpMyAdmin Install Wizard
To begin the installation of phpMyAdmin, access the installation URL at:http://example.com/phpmyadmin/setup/index.php
Under the “Servers” section, click on “New Server.”
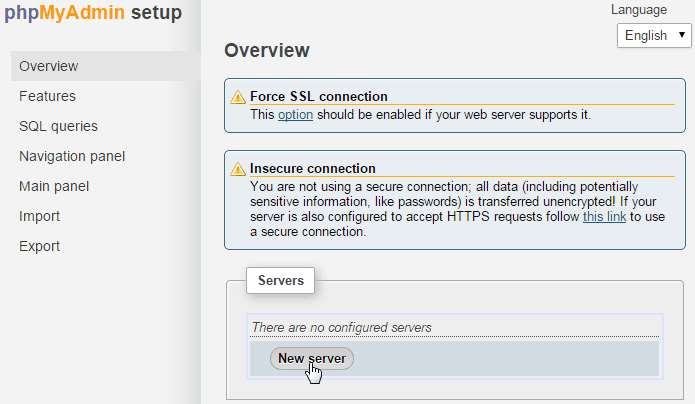
Under the “Servers” section, click on “New Server.”
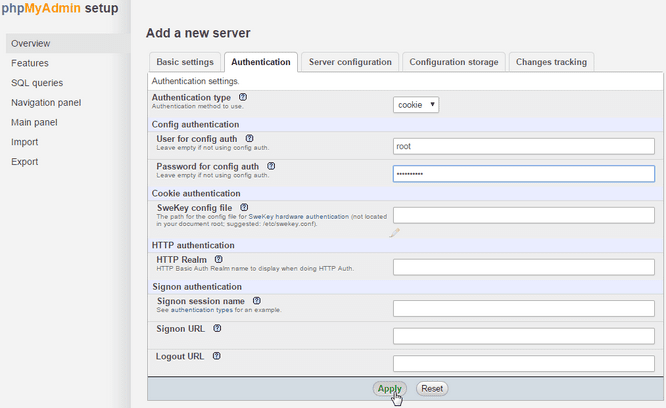
In the “Password for Config Auth” box, type in your MySQL root password.
1
|
sudo rm -rf /var/www/html/phpmyadmin/config
|
